Logo Fails: Why Your SVG Converts to Jagged PNGs (And How to Fix It)
 iSVGtoPNG Team

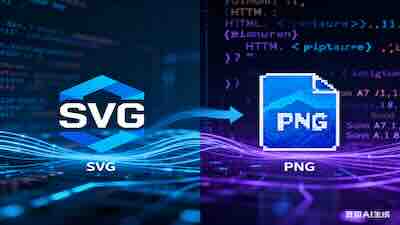
I’ve seen it happen more times than I can count. A design team spends weeks crafting the perfect logo—a beautiful, elegant SVG file where every curve is mathematically perfect. They hand it off, it gets converted to a PNG for the website, and... disaster. The once-smooth curves are now a jagged, stair-stepped mess. The logo looks cheap, unprofessional, and completely betrays the quality of the brand it represents.
As a web performance specialist who has led the technical side of multiple large-scale rebrands, this isn't just a minor annoyance; it's a critical failure point. I once consulted for a promising fintech startup whose entire launch was undermined by this exact issue. Their sharp, modern SVG logo turned into a pixelated nightmare on their landing page, instantly eroding the trust and credibility they desperately needed to build. The problem wasn't their logo; it was their workflow.
This guide is the distillation of 15 years of fighting in the trenches of image optimization. We're going to pull back the curtain and show you exactly why this conversion betrayal happens. More importantly, I'll give you a bulletproof, step-by-step workflow to ensure that your vector masterpieces are always translated into crystal-clear, pixel-perfect PNGs. This isn't about finding a magic "convert" button; it's about understanding the process like a professional so you can control the outcome, every single time.
The Crime Scene: Why Your Crisp SVG is Betrayed During Conversion
To fix the problem, you first have to understand the culprit. The reason your SVG looks jagged as a PNG isn't because of a single setting; it's a fundamental conflict between two different ways of describing an image.
Vector vs. Raster: A Clash of Philosophies
Think of it this way: an SVG is like a musical score. It's a set of instructions: "draw a perfect circle here with a radius of 50px," "create a Bézier curve from this point to that point." A musician (the renderer) can play this score on a tiny flute or a giant church organ, and it will always be the same perfect melody.
A PNG, on the other hand, is a photograph. It's a fixed grid of colored squares (pixels). It's not a set of instructions; it's a static, unchangeable record of a single moment. When you convert an SVG to a PNG, you're essentially "photographing" the musical score. The quality of that photograph depends entirely on the camera, the lighting, and the photographer's skill.
The Root of All Evil: The Tyranny of the Pixel Grid
Here's the core technical problem: your computer screen is a grid. The "jaggies" you see—a phenomenon called aliasing—happen when the perfect mathematical lines of your SVG don't align perfectly with the rigid pixel grid of the PNG.
Imagine a line in your SVG that is supposed to exist at a position of 10.5 pixels. A pixel can't be half-on and half-off. The rendering engine has to make a choice: should it color pixel 10 or pixel 11? This indecision, repeated thousands of times along a curve, creates the jagged, stair-step effect. To smooth it out, the renderer uses anti-aliasing, which adds semi-transparent pixels along the edge to create an illusion of smoothness. But when done poorly, it just looks blurry.
How Most Converters Get It Wrong
Most simple, free online converters prioritize speed and cost over quality. They use basic rendering engines that take shortcuts. They don't spend the necessary computational power to carefully sample the vector data and map it intelligently to the pixel grid. They just perform a quick-and-dirty rasterization, which is why you end up with jagged, unprofessional results.
The Fix: A Pro's Workflow for Pixel-Perfect Logos
Getting a perfect PNG from an SVG isn't about luck; it's about a deliberate, multi-stage process. Follow these steps, and you'll eliminate jagged edges for good.
Step 1: Master Your Source SVG (The Pre-Flight Check)
The quality of your output is determined before you even start converting. A pristine source file is the foundation of a pristine PNG.
- Pixel-Snapping is Non-Negotiable: This is the single most impactful thing you can do. In your design tool (like Illustrator, Figma, or Sketch), ensure that all the key points, lines, and shapes of your logo are aligned to the whole-pixel grid. A shape that starts at x=10.5 will always cause rendering problems. A shape that starts at x=10 will be sharp.
- Clean Your Code: SVGs exported from design tools are often filled with junk code, redundant groups, and unnecessary metadata. Before converting, run your file through a dedicated SVG optimizer. This not only reduces file size but also removes potential rendering quirks, giving the converter a cleaner set of instructions to work with.
Step 2: The Art of High-Fidelity Conversion
With a clean source file in hand, you can now focus on the conversion itself. This is where you leverage techniques to force the renderer to produce a higher quality result.
The most powerful technique is called supersampling. Instead of rendering the PNG at its final target size (e.g., 100x100 pixels), you render it at a multiple of that size (e.g., 200x200 or 300x300) and then scale it down with a high-quality algorithm. This gives the rendering engine more pixel data to work with, resulting in vastly superior detail and smoother lines. This is the same principle that makes Retina displays look so sharp, and it's a technique we explore in-depth in our guide to automating @2x/@3x exports.
This is where a quality-focused SVG to PNG tool becomes critical. It needs to have a high-quality rendering engine that respects your hard work and ideally allows you to specify a resolution multiplier to perform this supersampling technique easily.
Step 3: The Final Polish for Performance
Your PNG is now sharp, crisp, and professional. But is it fast? High-quality, uncompressed PNGs can be large, which slows down your website. The final, non-negotiable step in any professional workflow is optimization.
Run your newly created, crisp PNG through a lossless PNG compressor. This will intelligently reduce the file size—often by 50-70%—without touching a single pixel of your precious image data. You get the quality and the performance.
Advanced Diagnosis: When the Problem is Deeper
Sometimes, even with a good workflow, you'll run into specific issues, especially with complex logos. Here are a couple of common "gotchas."
The Case of the Disappearing Thin Lines
If your logo has extremely thin "hairline" strokes, they might disappear entirely during conversion. This happens if the stroke width is less than one pixel at the target resolution. The fix is to go back to the source SVG and ensure that all strokes have a minimum thickness (e.g., at least 1px) to guarantee they survive the rasterization process.
The Blurry Edge Conundrum
Sometimes the problem isn't jaggedness, but its evil twin: blurriness. This happens when a converter's anti-aliasing is too aggressive, creating a soft, fuzzy halo around your logo instead of a sharp edge. This is a complex topic that involves the nuances of different anti-aliasing algorithms and how they interact with your source file. For those who want to master this, I've written a complete deep-dive on fixing blurry edges and anti-aliasing nightmares.
Conclusion: From Victim to Master of the Pixel
A jagged logo isn't a sign of a bad design; it's a sign of a broken process. The frustration you've felt is valid, but the power to fix it is entirely within your control. By shifting your mindset from just "converting" to "managing a workflow," you can eliminate these issues permanently.
The path to a perfect PNG is clear: start with a clean, pixel-snapped SVG source. Use a high-quality conversion method that leverages supersampling. And finally, optimize the result for web performance. By embracing this professional workflow, you ensure your brand's visual identity is always presented with the clarity and quality it deserves.

iSVGtoPNG Team
iSVGtoPNG Team is a front-end developer and graphics enthusiast with over 10 years of experience in web technologies. She loves exploring the intersection of design and code.


