How to Bulk Convert One SVG to Multi-Size PNG Icons (16px, 32px, 64px)
I remember the exact moment I realized our team's icon workflow was broken. I was working on a web app that needed a full set of favicons—16x16, 32x32, an Apple touch icon, Android chrome icons... the list felt endless. I spent a solid hour in a design tool, meticulously exporting the same logo SVG over and over, resizing, renaming, and hoping I didn't make a mistake. A week later, the designer made a tiny tweak to the logo, and I knew I had to do it all over again.
As a front-end developer with over 15 years of experience, I can tell you that this tedious, repetitive task is one of the biggest "time sinks" in modern development. It's inefficient, prone to human error, and completely at odds with the automated, component-driven world we now live in. Relying on the "Export As" dialog is a bottleneck, and it's time we eliminated it.
This guide is your plan for doing just that. We're going to establish a professional, automated workflow built on a simple, powerful idea: the "single source of truth." I'll show you how to take one master SVG file and programmatically generate every single PNG size you need—16px, 32px, 64px, and beyond—in a single, repeatable operation. This is how you reclaim your time, eliminate errors, and build a truly scalable asset pipeline.
The Core Principle: SVG as Your Single Source of Truth
Before we touch any tools, we must embrace a fundamental mindset shift. The master version of your icon or logo should always be an SVG (Scalable Vector Graphic). Unlike a PNG or JPEG, which are fixed grids of pixels, an SVG is a set of mathematical instructions. It's a blueprint, not a photograph.
This makes it the perfect "single source of truth" because it is resolution-independent. It contains all the information needed to generate a flawless image at any size, from a tiny 16x16 favicon to a massive billboard. When you have a master SVG, you never have to worry about upscaling a low-resolution image, a process that, as we've discussed, shouldn't involve AI guesswork for vectors.
By committing to an SVG-first workflow, you ensure that every icon generated from it is derived from the same canonical, high-quality source. This is the foundation of brand consistency and workflow efficiency.
The Professional Workflow: From One SVG to Many PNGs
This workflow is a four-step process that takes you from a source file to a complete, optimized set of production-ready icons. It's designed to be fast, reliable, and scalable.
| Step | Action | Why It's Critical |
|---|---|---|
| 1. Prepare SVG | Clean and optimize your master SVG file. | Ensures a reliable, error-free source for conversion. |
| 2. Choose Tool | Select a tool designed for batch operations. | Enables the "one-to-many" workflow efficiently. |
| 3. Configure Export | Define all required output sizes (16px, 32px, etc.) and naming conventions. | Automates the resizing and organization of your assets. |
| 4. Compress PNGs | Run all generated PNGs through a final compression pass. | Ensures maximum performance without sacrificing quality. |
Step 1: Prepare and Sanitize Your Master SVG
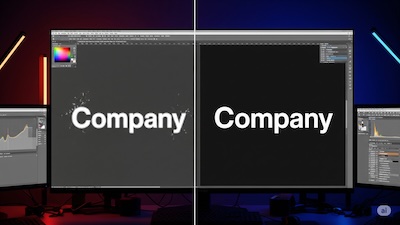
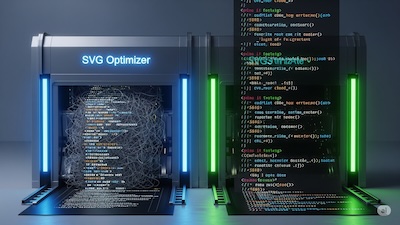
The quality of your final PNGs is entirely dependent on the quality of your source SVG. SVGs exported directly from design tools are often bloated with unnecessary code that can cause rendering errors.
- Inspect the Code: Open your SVG in a text editor or an online SVG Viewer to see what's under the hood.
- Automate the Cleanup: The best practice is to use a dedicated SVG optimizer. This tool will programmatically strip out junk code, collapse groups, and round numeric values. This is essential for avoiding issues, as detailed in our guide on cleaning SVG code for sharper images.
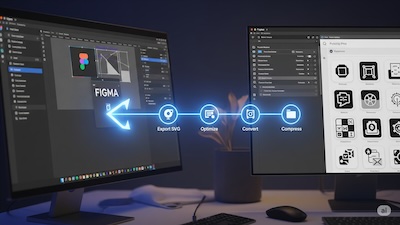
Step 2: Choose Your Bulk Conversion Weapon
With a pristine SVG ready, it's time to generate the multiple sizes. You need a tool designed for batch operations. For most designers and developers, the most efficient tool is an online SVG Batch Converter. These tools are built specifically for this one-to-many workflow. They allow you to upload a single SVG and define a list of desired output sizes in one simple interface. For power users, scripts using libraries like `sharp` in Node.js are the answer, forming the core of a fully automated CI/CD pipeline for icons.
Step 3: Configure Your Multi-Size Export
This is where the magic happens. In your batch conversion tool, you'll define your export targets. For our example, you would specify:
- Size 1: 16px width, 16px height
- Size 2: 32px width, 32px height
- Size 3: 64px width, 64px height
A good tool will also let you define a naming convention. A common pattern is to use the original filename and append the size: icon-user.svg → icon-user-16.png.
Step 4: The Final Polish - Bulk Compression
You've just generated a folder of sharp, correctly-sized PNGs. The final step is optimization. Run the entire folder through a high-quality, lossless PNG compressor. This will reduce their file size—often by 50-80%—without touching a single pixel of visual data. Many batch converters have this feature built-in, allowing you to convert and compress in a single step.
Practical Use Cases: Where This Workflow Shines
This one-to-many conversion workflow is the solution to several common, real-world development challenges.
Generating a Complete Favicon Set
This is the classic use case. A modern website needs a whole suite of icons. A single favicon.ico file often contains multiple sizes (16x16, 32x32, 48x48). On top of that, you need a 180x180 PNG for Apple touch icons and 192x192/512x512 PNGs for your Web App Manifest. With this workflow, you can generate all of these from your master logo SVG in a single batch operation. Some specialized tools, like our Image to Icon tool, are designed for exactly this purpose.
Creating Responsive Icons for Web Components
Sometimes you might want to use different icon sizes at different breakpoints (e.g., a larger 48x48 icon on desktop but a smaller 24x24 version on mobile). This workflow allows you to generate the full set of required sizes, which you can then use with CSS media queries or the HTML <picture> element.
App Icon Generation
For mobile or desktop app developers, the list of required icon sizes is even longer. iOS and Android require dozens of variations for the App Store, home screen, and notifications. Automating the generation of this icon set from a master SVG can save days of tedious manual work.
Conclusion: Automate the Tedium, Master the Workflow
The days of manually exporting multiple sizes of the same graphic are over. It's an outdated practice that costs you time, introduces errors, and creates inconsistency. By embracing a modern, SVG-first workflow, you turn a chore into an efficient, automated process.
The path is clear: 1. Sanitize your master SVG. 2. Use a batch converter to generate all required sizes. 3. Compress the final PNGs. This simple but powerful discipline will make you a faster, more efficient developer and ensure your brand's visual assets are always delivered with pixel-perfect precision, no matter the context.
iSVGtoPNG Team
iSVGtoPNG Team is a front-end developer and graphics enthusiast with over 10 years of experience in web technologies. She loves exploring the intersection of design and code.